Showing posts with label DIY. Show all posts
Showing posts with label DIY. Show all posts
DIY Bee Bathroom Decor
My Guest Bathroom is designed around the theme of Bees. It started
when I created some Bee Art and then I've been collecting and creating
since then.
Here's my new DIY Bee Collage:
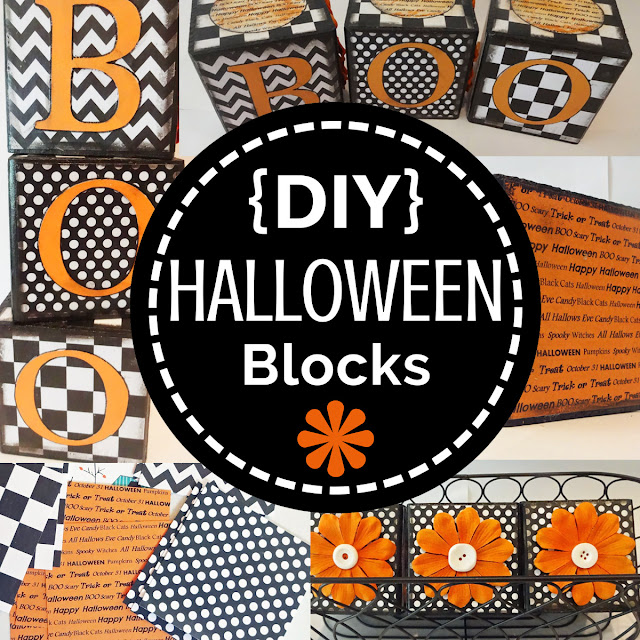
Halloween Block Decorations - DIY Yourself some Unique Decorations
Halloween is huge in our neighborhood... in our town... in our house. The leaves are starting to change and the air is getting a little crisper at night so I'm feeling inspired to make some decorations.
DIY Upcycled Cabinet Door = Easy Decorating
Do it Yourself Home Decor by taking an old Cabinet Door and creating an easy decorating piece that can be changed out to suit your decor, seasons and holidays.
Fun & Festive Christmas Wreaths (that you can make yourself)
Check out all these cute and creative Christmas Wreaths.
Lots of fun ideas that you can make yourself.
Cute (and Easy) Garland Project for Valentine's or any Holiday
I've been feeling a little crafty this past month so here's a cute little garland project I put together.
#paperjunkie It'll add a fun touch to your holiday decorating and you can make one for any holiday or event you want.
Valentine's Day Heart Garland
Choose 3-5 coordinating sheets of your favorite scrapbook or vintage paper.
Cut out shapes (hearts, circles, stars, pumpkins, etc). Cut 2 pieces (front & back) for each; vary sizes if you want. I used my Silhouette, but you can also trace/cut with scissors or use various punches.
Determine how long you want your garland (add several extra inches on each end for hanging).
Measure and cut thin string or ribbon.
Glue front and back of each shape with string on the inside. Press firmly so each side is glued securely. Vary colors/patterns and sizes.
I hung mine on my sofa table - used clear command hooks and attached the garland to it.
I did another for Christmas, too. You can make garlands for Easter, Halloween, July 4th, etc. Also a terrific project to do with your munchkins.
Have a creative and fun week!
Love, Steph
Make sure to follow CreativeSteph13Art on Instagram:
DIY Easy Planter Stones - a simple project to brighten up any room
Plants are a beautiful accent to your home decor and really brighten up a room (as well as make the air cleaner). But sometimes the soil in a planter looks less than appealing. Even with new soil, it often looks a little dingy.
(I know, I know... the dirt looks dirty -haha)
I love Mexican Beach Pebbles (although they're a lot bigger than pebbles). They're
smooth and are often used for walkways or patio-scapes. Got these at Home Depot for around $11 and will only use a small portion of the bag so I can do several projects with the one bag. They have a couple of stone sizes so select what works best for your planter. I chose a natural color but I've also seen them in white. The natural color is pretty enough but I wanted to ratchet it up a bit with a little paint.
Select the stones - I chose a variety of stone sizes (small, medium and large).
For my 13" pot, I used 45 stones. Just make sure you have enough to cover the top of the dirt and add several extra stones so they can be stacked up in the planter to cover any open spaces.
Wash and dry the stones to remove any dust and prepare the surface. I washed them inside a colander so it wouldn't scratch my sink and they were easier to move. When completely dry, start the painting.
Wanted to paint the stones to accent my decor colors so I chose a red. It was a little too bright so I mixed it with some raw umber to tone it down. I used acrylic paint, but maybe in the future I would just spray paint them as it was a little messy. Painted one side with a foam brush and placed them on an egg carton for drying. It took about 15-20 minutes drying time between coats. Did 2-3 coats.
Once finished, I sprayed the stones with two coats of clear acrylic spray paint.
Loved the final look! Such a simple thing, with a big return.
I think I'll do this for my outdoor patio planters too.
Happy decorating.
Love, Steph
Easy and Fun Easter Letter Project - add a splash of creativity to your Spring
Supplies
Cardboard Letters
Scrapbook Paper (3-4 coordinating colors)
Craft Paint
Mod Podge
Flower Punch
Buttons
Glue
Stamping Ink
Cardboard Letters - you can get them at most craft stores. I got mine at Hobby Lobby. I selected letters for Easter, but you could also choose Spring, Bloom, Bunny, etc.
Choose paper for each letter.
Reverse the letter and trace it on the back of the paper (to avoid pencil marks) and cut out.
Paint Letters White (regular old craft paint).
Glue paper letters using Mod Podge or Gel Medium; use 2-3 coats.
Dry thoroughly between coats making sure the paper edges are securely glued down.
Punch out flowers from coordinating accent paper.
You could also purchase paper or silk flowers
You could also purchase paper or silk flowers
Lightly edge each letter with black ink to add dimension.
Glue Flowers - I chose to just decorate the bottom of the letters,
but use your creativity and make it your own.
Add buttons to accentuate.
Action Steps
Paint Cardboard Letters
Cut Paper to Match Letters and Glue
Edge with Ink
Add Flowers and Buttons to Decorate
Display
Happy Decorating!
Love, Steph
Subscribe to:
Posts (Atom)


