I don't know about you, but I NEVER have enough room on my desk. Papers seem to multiply and even with having my keyboard and mouse under the desk, I still felt like I didn't have any working space.
So, I decided to create my own computer shelf and, of course, it couldn't be boring AND had to match the chocolate/teal colors in my office. Hit Home Depot and a scrapbook store to get started.
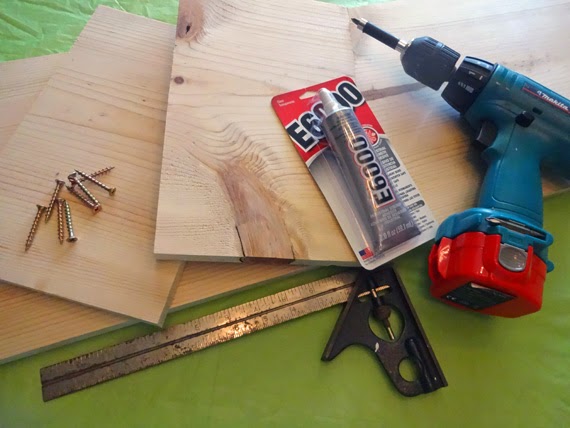
Supplies
- Board (6' long x 12"wide x 1" thick)
- 8 Screws (at least 1 1/2 inches long)
- Glue (used E6000 but any type of wood glue would work also)
- Square (to make sure it was square - haha)
- My trusty Makita Drill/Screwdriver
- Scrapbook Paper (at least 15-20 sheets of coordinating colors/patterns)
- Mod Podge & Foam Brush
- Heat Gun (optional, but it helped with the drying time)
- Adhesive Felt Pads
My desk is 48 inches wide so I wanted the shelf to be 46" wide x 8" high
(wanted to be able to fit my stuff underneath, but not too wide that I'd worry it slip off the side of the desk). Home Depot very kindly cut the wood for me (one 46" piece and two 7" pieces). Note: Figure out what size/height works for you and have the wood cut accordingly - I wanted a taller shelf but you may prefer something shorter.
Glued the sides to the top and then added the screws for stability. Used the square to double check the corners. One of the sides wasn't quite level so I sanded it a bit.
Cut my scrapbook paper into a bunch of strips
(different widths and lengths).
Using the Mod Podge, started gluing the strips, layering them and varying the pattern. I wrapped them around the top and sides.
(Did the underneath side last).
Kept layering.
More layers until the whole thing was covered and I liked the look. Took about 2 hours. Then I put two more coats of Mod Podge on the entire shelf for some extra protection
(you could also use some gloss spray paint for extra sealing). Let it set for an hour to make sure everything was dry and that everything looked glued down.
(If you see any pieces not completely covered, just pull out more Mod Podge and give it another layer). Added the
Adhesive Felt Pads to the bottom
.
Finished!!! It turned out soooo cute! Was able to put my sweet little
Martha Stewart Supply Drawer underneath with my router on top. Will probably put some project boxes underneath - still working on them.
Hope the creative bug hits you this week! Love, Steph
Stay in Touch by following me on...


