Blessings From Above - New Art + a little instant gratification


After I wrote about the sweet surprise my dad had for my mom here, I wanted to capture that special feeling and put it on canvas. Something that would remind me of the deeper and long lasting love of family and encourage me to be the type of person who thinks of others and tries to be a blessing in their lives.
 (Even if you have to be a little sneaky - thanks dad!)

So I created this canvas called Blessings from Above.  I love looking at it everyday!

 (I'm trying something new and have added an Instant Digital Download section to my Etsy Shop - that way you can buy art online and download art straight to your computer and print it out yourself - instant gratification - online art - no waiting! ) 


Hope you have a blessed week!
Love, Steph

Excellent Adventures: Blenheim Palace

One of our favorite (or favourite if we're British) places we visited on our Excellent Adventure to London was Blenheim Palace. One our way to the Palace we toured the Costwolds and stopped off in Cogges Farm and Bampton (two locations where they film Downton Abbey). We even happened across a pre-production crew getting everything ready to film the following week.

 
Blenheim Palace was built in 1705 as a gift to John Churchill, the 1st Duke of Marlborough and military commander, to celebrate the victory over the French in the War of Spanish Succession.  


How'd you like this for your front door?

 Just in case you wanted something to read.


Inside their Chapel with the famous Willis Organ.

One of their door handles.

Birthplace of Winston Churchill in 1874.

2000 Acres of Gardens: Rose Garden, Water Terraces, Italian Garden, Secret Garden, Marlborough Hedge Maze, Butterfly House, Lavender Garden and many more.


Here's an overhead view that I got from their website - it's over 12,500 acres. 


Happy Adventuring!
Love, Steph


More Excellent Adventures:
 

Excellent Adventures: London: Kensington Palace


A little day out at Kensington Palace, home to royalty for over 300 years. 
And a current home to William & Catherine and many other royals.
(their quarters were in a private section of the palace so we weren't able to view them)


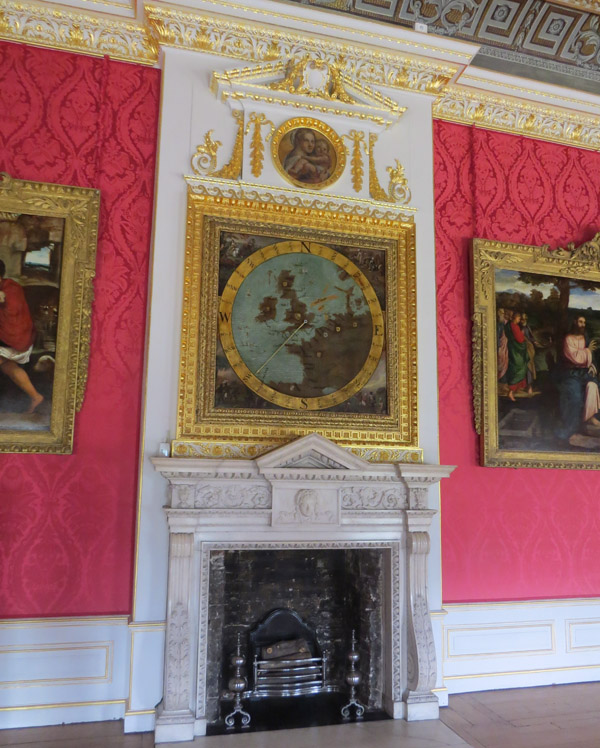
King's & Queen's State Apartment...How'd you like to get through a door in this dress?


Fashion Rules Exhibition with dresses from Queen Elizabeth,
Princess Margaret and Princess Diana. 


Palace Sunken Gardens - just a small backyard.


 I want this for my backyard.

Afternoon Tea at the Queen Anne Orangery - so yummy.
And because the weather was beautiful, we got to sit outside.

Happy Adventures this summer!
Love, Steph


Excellent Adventures: London: Kew Botanical Gardens

So jet lag has been the boss of me since we got back from our trip to London and Paris (read about the sweet back story here). Am only now getting back to a regular sleep schedule and being able to put two coherent sentences together.


First of all.... BEST. TRIP. EVER.

It's all a whirlwind, but the amount of beautiful, amazing and spectacular things we saw truly "wowed" us.

One day, we took the "tube" (look at me all British-like) out to Kew Royal Botanical Gardens. At over 326 acres, it's the worlds largest collection of living plants. We walked and walked, and walked some more, and kept discovering some truly remarkable gardens. It was created in 1631 and used to be someone's King George II backyard (for his daughters) before it was later combined with another neighbor's backyard to create the Royal Botanical Gardens.

 Kew Palace - just a little weekend getaway.


Princess of Wales Conservatory - they have rooms set up with different climates to grow rare breeds of plants. Such as....


Palm House with it's spectacular gardens and lake.


This was just one morning of our Excellent Adventures. I love, love, love all the gardens - my head was spinning with all the ideas I could implement in my own (slightly smaller) yard.

Hope you have a colorful week!
Love, Steph


Excellent Adventures: Woodburn Tulip Festival


Acres and Acres and Acres of Tulips - what a sight!


Isn't it funny how you can live some place, but often never see many of the fun things the area has to offer? Life and schedules so often get in the way. When people come to visit, that's when we see what's around us - when we're showing it to others.

I've decided to try and stay a "perpetual tourist" and always be on the look 
out for new things to do and see and try.
Plus, this way I feel like I'm always on vacation (ha).

 My mom has lived here for 40 years and never made it to the Tulip Festival in Woodburn, so I decided to take her on an Excellent Adventure to the Wooden Shoe Tulip Farm.

Forty acres of stunning beauty backed by Mt Hood. The fields are striped in color with so many types of tulips. I took one picture after another (me and everyone else). Nothing like trying to balance in the middle of a field trying to get the perfect shot. #graceful

 In addition to all the beauty surrounding us, they were lots of vendors, food, games and rides for the kids, as well as their darling gift shop. You can buy fresh flowers or order bulbs to be delivered.  #somanytochoosefrom

Makes me want to plant my whole yard in Tulips.


Hope you can be a "tourist" this week and enjoy your little corner of the world!

Love, Steph


You Can Make Your Own Vintage Sign

I love the look of Vintage Signs, so I thought I'd create something of my own,
customized for me, at just a fraction of the cost.

All I needed was a few pieces of scrap wood, some paint and contact paper.
I wanted a sign for my art studio door of the Number 13. It's part of my company
name and I've always loved it. (no superstition for me :)

I dug through my scrap wood pile and found 4 boards (3 1/2 inches wide) and cut them to a 17 inch length. Any size wood will do - just depends on how big you want your sign to be. Pick something relatively thin so it's not too heavy - probably around 1 inch works best.

 Lined up the wood and on the back I used some smaller pieces to nail
everything together and stabilize it a bit more. 

Assembled the wood. A little glue, a few nails. 
Sanded it just a little bit because I wanted it to look very vintage. 

  A talented friend told me about printing letters/numbers on contact paper so I thought I'd give it a try. I discovered the ink from my printer didn't want to stick to the contact paper,
so I just printed the numbers out on legal size paper, taped them to the contact
paper and cut it out with scissors (worked great).


I chose flat black paint for my base coat. You could also use a stain.
Just remember the base coat will be the color you want your letters/numbers/words to be. 

Once the base coat was dry, I wanted to line up the numbers evenly so I drew a very light line with my t-square. (It was painted over with the top coat)

Peeled the contact paper off the number and lined them up on the wood. Because the wood was so rough, they wouldn't stick very securely. I just pressed them down and they stayed in place (sort of).

For my top coat, I chose ivory flat paint. I painted it very gently with the foam brush. I held down the numbers with my fingers and brushed from the inside out of the contact paper in order to get a crisper edge. Used a light coat of paint as I wanted it to look distressed.

Once it dried, I removed the contact paper, and sanded it lightly.

Didn't want to put a hole in my studio door, so I turned to my
trusty Velcro Command Strips and a level to hang them.


Love it!!!
Happy Creating!
Love, Steph


Subscribe to CreativeSteph13 and get your FREE copy of my eBook - Essential Organizing Tools